Optimize WordPress Site Performance
In this article, we’ll be discussing 10 different ways you can improve your WordPress site and admin dashboard’s optimization with.
Table of Contents
1. Test WordPress Site and Dashboard Performance
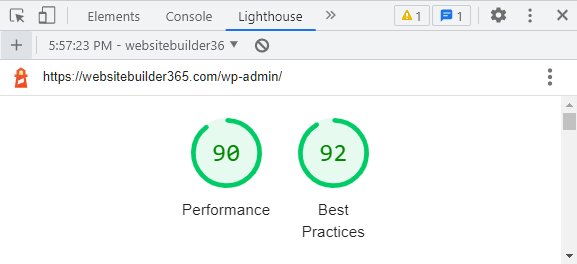
Before changing anything about your site or admin dashboard page, the first thing you should do is measure your WordPress site and admin dashboard’s speed as they currently are. This is so you can compare and identify any future improvements to your site’s performance after you follow some of the changes I suggest here. This is done relatively easily and conveniently thanks to desktop browsers having built-in tools that check site performance.
For example, if you’re using Google Chrome, you can simply right-click anywhere on the page you’re on to open the Inspect tool on your site. From here, find the “Lighthouse” tab in the new interface that appears, and click the “Generate Report” button below the Lighthouse image. This lets you generate a report that lets you see what your WordPress site and admin dashboard is being slowed down by. You can then use this information to guide your next steps in improving performance based on the unique factors you might identify.
2. Install WordPress Updates
The first method I’ll talk about is to simply update your site’s WordPress version. 49.07% of WordPress sites aren’t running the latest version of WordPress, and 33.58% of WordPress sites are at least 2 updates behind the latest version. While many people may not keep their WordPress sites up to date with the newest version, there are clear benefits to their site’s performance that they’re missing out on. WordPress updates can include optimization updates to WordPress’s features and coding, speed and security improvements, bug fixes, and more. This means you can improve your site’s overall performance simply through keeping its WordPress version updated to the newest available version.
Installing WordPress updates is much simpler than you might assume. To install updates, simply enter the “Updates” page under the “Dashboard” tab in your WordPress dashboard menu, then install any updates you see. The same process is used for WordPress plugin and theme updates.
3. Delete Inactive Plugins
Deleting inactive plugins is very straightforward. Enter the “Installed Plugins” page under the “Plugins” tab in your WordPress admin dashboard menu. You can only delete inactivated plugins, so under any active plugins you’d like to delete, click the “Deactivate” option to do so. Then, under any inactivated plugins, simply click the “Delete” option below the plugin’s name. WordPress will ask you for confirmation for this deletion, so click the “OK” option to proceed, and the plugin will be safely removed and uninstalled from your site.
Another reason to delete inactive plugins is because unused but not-deleted plugins could become potential security liabilities for you to deal with in the near or far future. Loopholes and weaknesses in their code could mean danger against the safety of your site. Be sure to delete unused plugins, not just to improve site performance, but also to ensure safer site security bot for you and your visitors.
4. Update Your Site’s PHP Version
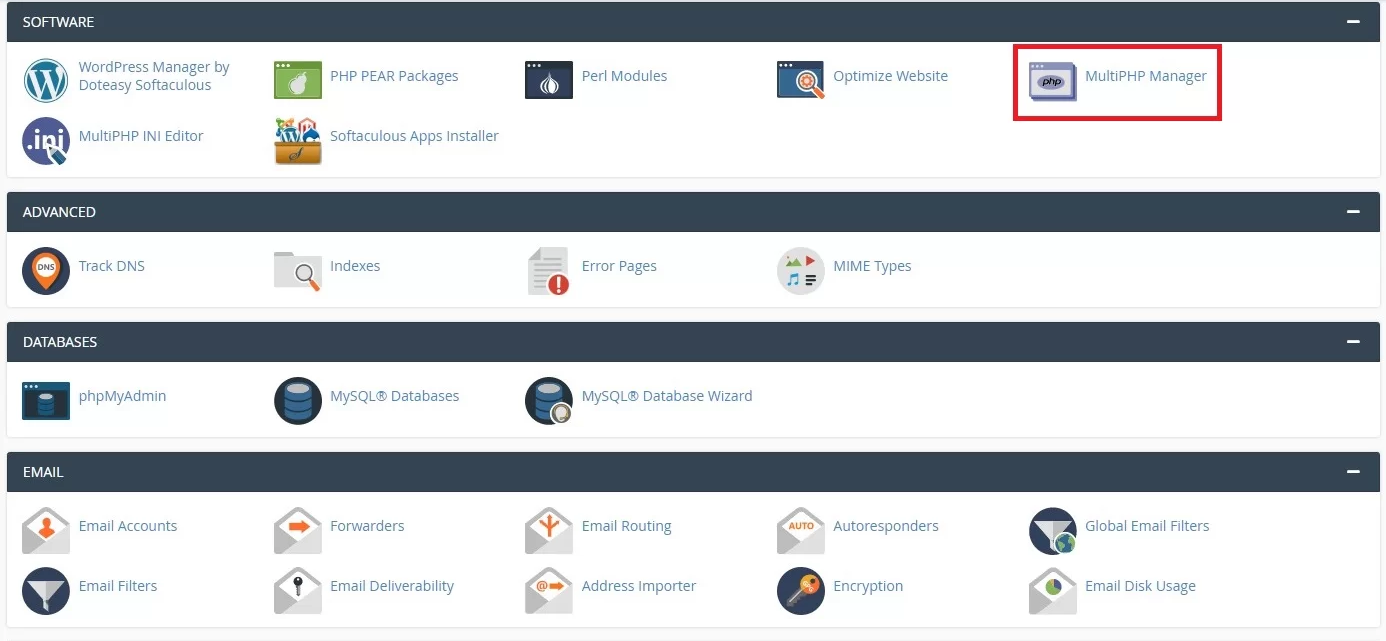
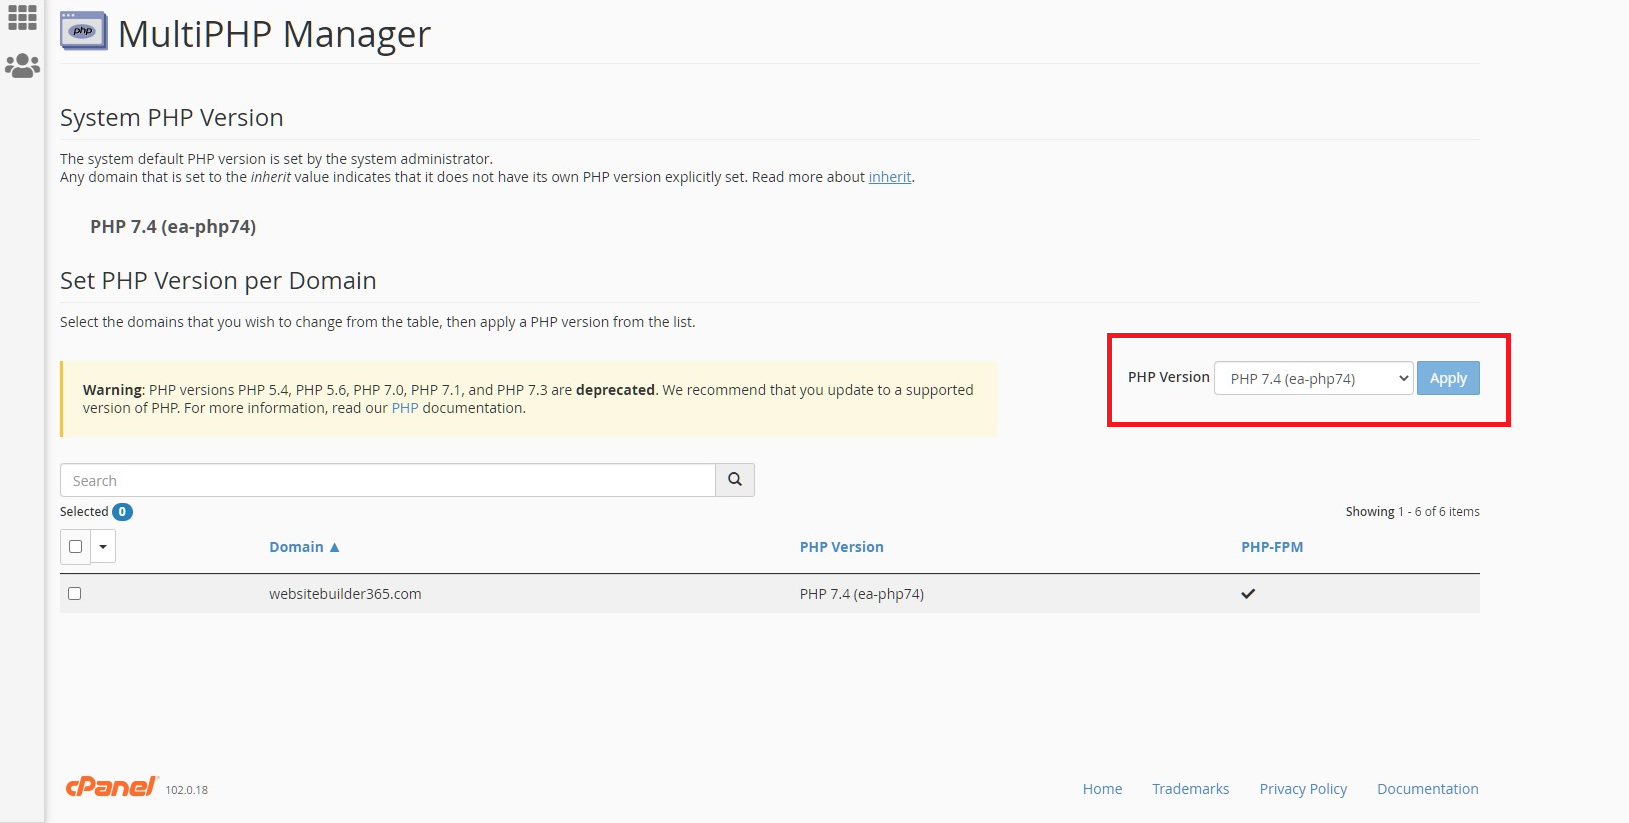
If you’d like to check your current PHP version, click “Site Health” under the “Tools” tab in your admin dashboard menu. Click into the “Info” tab, and look for “PHP version” in the “Server” section. If you need to update your version, it’s relatively straightforward to update your PHP version. The specific steps vary depending on your web hosting provider, but in general, you may enter your hosting control panel, which could be something like cPanel, and look for an option indicating itself to be something like a PHP Manager or PHP Management System. From here, you’ll be able to select the PHP version you’d like your site to run on.
5. Check Your PHP Memory Limit
All sites need memory to smoothly operate itself and all its associated plugins and features simultaneously. If you don’t have enough memory available for PHP and WordPress to operate with, it might slow down and even crash your entire site. Often, more data-heavy sites like those with long pieces of writing, many images, active forms, or process-heavy plugins, all of which use lots of data, have a need for more memory compared to typical sites without these features.
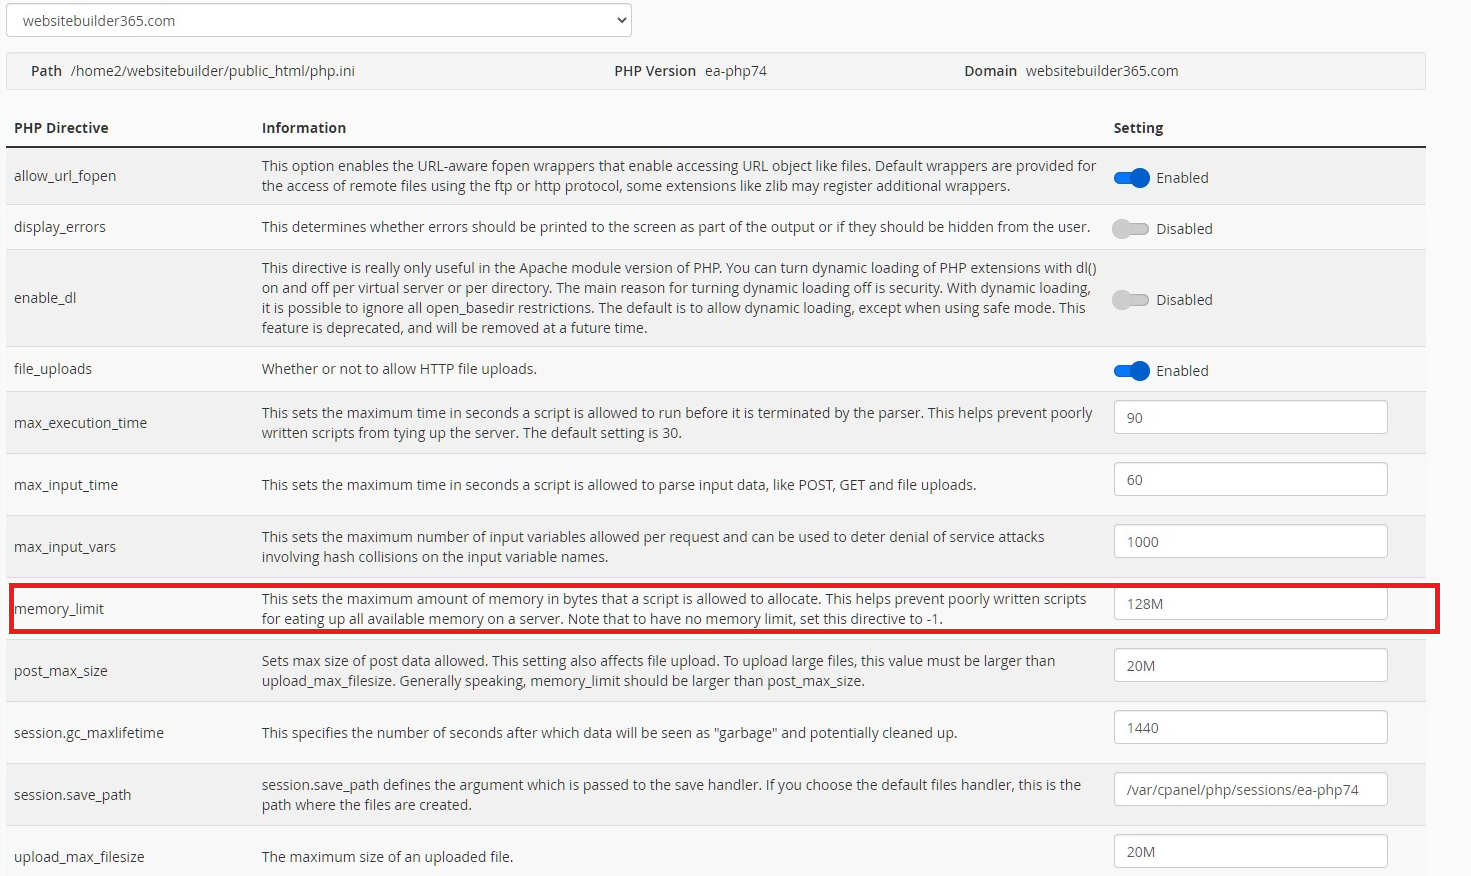
The good news is that there’s typically more than enough memory allocated to sites’ functioning. To see your PHP memory limit for yourself with WordPress, start by finding the “Tools” tab in your admin dashboard menu and clicking on “Site Health”. From there, enter the “Info” tab and look for “PHP memory limit” under the “Server” section. For a typical site, a memory limit of 128MB is more than sufficient and will support the site’s functions with little to no issue.
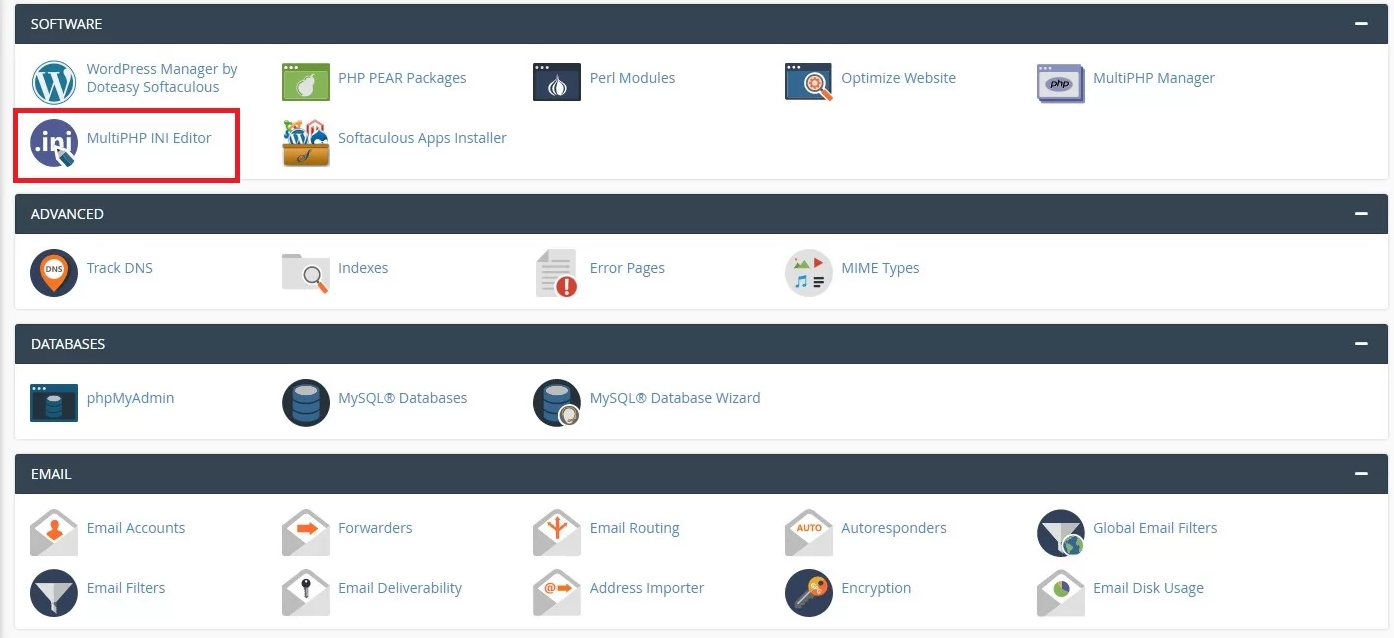
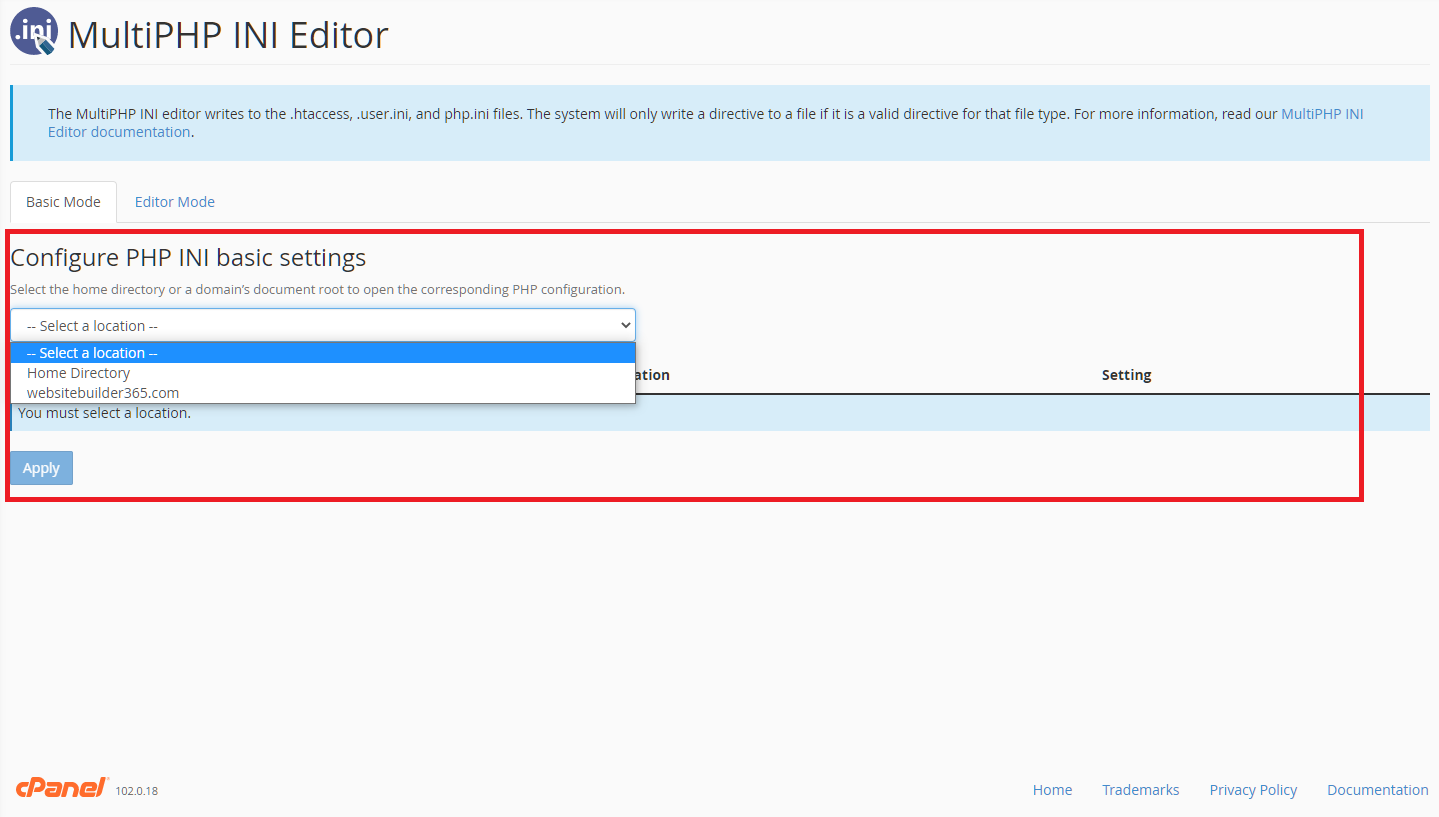
With my web hosting provider, my PHP memory options can be found by entering my cPanel interface once you’ve logged in. Find and click into the “MultiPHP INI Editor” page. From here, choose the domain that you want to edit the PHP configuration for. You’ll then be able to directly tweak your memory limit based on your site’s needs.
6. Install Caching Plugins
7. Reduce WordPress Dashboard Widgets
8. Fix Slow WooCommerce Dashboard
9. Lock WordPress Admin and Login Pages
DDoS attacks and hacking attempts are common problems faced by WordPress sites and their owners. Particularly, brute force attacks are the most common form of malicious attempt against WordPress sites. In brute force attacks, attackers submit hundreds of passwords at once in hopes of eventually guessing the password correctly and gaining access to the attacked site. Brute force attacks may not take down your site, but are very likely to slow down and limit access to your website. This is why I recommend installing Loginizer. This is a plugin that helps you tackle problems from brute force attacks by limiting login attempts to only 3 tries before blocking the IP address of the attempts. It’s also able to blacklist and/or whitelist IPs that try to log in, so you have more control over who can or can’t try to log in to your site.
Because of how vital plugins like Loginizer are in defending against security threats, some web hosting providers give users the option to install this plugin alongside their initial WordPress installation. A web host that I used, Doteasy, is one of these hosting providers. I’ve gone through several different web hosting providers, and while they all offer similar features at similar price points, what’s stood out to be about Doteasy specifically is their quality client support. Whenever I’d run into a problem and contact them for help, I was always greeted with friendly, knowledgeable, and responsive service, which sets them apart from other web hosts’ client support resources who are often lacking in knowledge, or aren’t real people at all. They even offer a vast resource of WordPress site and plugin knowledge for anyone to refer to, which has helped me out a lot in the past. Alongside their clear concern for users’ site security and pleasant experience, I’ve had great experiences with their quality yet affordable hosting plans and consistent server uptime. If you’re looking for a reliable and value-packed hosting experience, why not give Doteasy a try?
Alongside protecting yourself against malicious login attempts to your site, it’s important to rename the default “wp-admin” login URL that’s used to access the login page to begin with. This URL is the default login URL used across all WordPress websites, making it widely known to casual WordPress users and seasoned cybercriminals alike, so keeping this login URL unchanged means your site is more at risk of being brute force attacked. I’d recommend installing a lightweight plugin called Lockdown WP Admin, which lets you hide the “wp-admin” URL, and lets you customize your own unique login URL as well. This means that instead of having the typical login URL of yourdomain.com/wp-admin/ that anybody could easily find and use to maliciously attack your site, you need to access yourdomain.com/thisiswhereilogin, yourdomain.com/pineappleonpizza, or any other URL you can think of that only you would know of, in order to try to log in. This enhances your site security and makes it harder for malicious attackers to find and attack your site’s login page.
10. Upgrade Your Hosting Plan
As websites grow in size, such as receiving more traffic, hosting more content, and needing more resources, you might notice slow or subpar site performance becoming an issue. This indicates that you’ve likely outgrown your current hosting plan, which you’d bought before the growth of your site. While this is a problem for your site’s performance, it also demonstrates desirable growth of your site’s reach and audience, which is something that you should be happy about but also prepare yourself to accommodate for with your future hosting plans. The solution to this uniquely desirable issue is to consider upgrading your site to a better hosting plan, so that your site benefits from faster and more powerful hosting infrastructure. Your site will receive the increased power and support it needs to accommodate what you and site visitors expect from it. When looking for a new hosting provider, don’t be afraid to browse around and find a new plan or web hosting provider that you think will suit your needs.
There are a wide range of ways to improve your website’s performance, with different methods bound to fit your individual situations and unique circumstances. With the solutions we’ve discussed today, the improvements you see should be noticeable, and your site should be able to run faster and smoother.
